Creating visually appealing newsletters in Microsoft Word has become an essential skill for businesses, organizations, and content creators looking to communicate effectively with their audiences. With the right knowledge of layout techniques, column structures, and image wrapping features, you can transform a simple document into a professional-looking publication that rivals those created with specialized design software.
Why Word is Perfect for Newsletter Design
Microsoft Word offers an accessible and cost-effective solution for newsletter creation, making professional design tools available to everyone. Unlike expensive desktop publishing software, Word provides built-in templates, intuitive formatting options, and seamless integration with other Microsoft Office applications. The software’s column feature allows you to create newsletter or newspaper-style columns in the entire document, not only giving it a traditional look but also saving printing costs by decreasing page count.
Setting Up Your Newsletter Foundation
Choosing the Right Page Layout
Before diving into columns and images, proper page setup forms the foundation of professional newsletter design. Start by navigating to the Page Layout tab and adjusting margins according to your content needs. For newsletters, slightly narrower margins (around 0.75 inches) often work better than standard document margins, providing more space for content while maintaining readability.
Consider your page orientation based on your newsletter’s purpose. Portrait orientation works best for text-heavy newsletters, while landscape can be effective for image-focused publications or shorter formats.
Creating Professional Headers and Footers
A well-designed header establishes your newsletter’s identity and creates consistency throughout your publication. To insert a professional header, go to Insert > Header and choose from Word’s built-in designs that include space for logos and newsletter titles. The header should feature your organization’s branding elements, including logo, newsletter name, and issue date.
For footer design, include essential information such as contact details, social media links, unsubscribe options, and copyright information. Professional footers often mirror website designs, providing readers with familiar navigation elements and legal compliance information.
You can learn more about creating headers and footers in Microsoft Word for detailed step-by-step instructions.
Mastering Column Layouts for Professional Appeal
Understanding Column Types and Applications
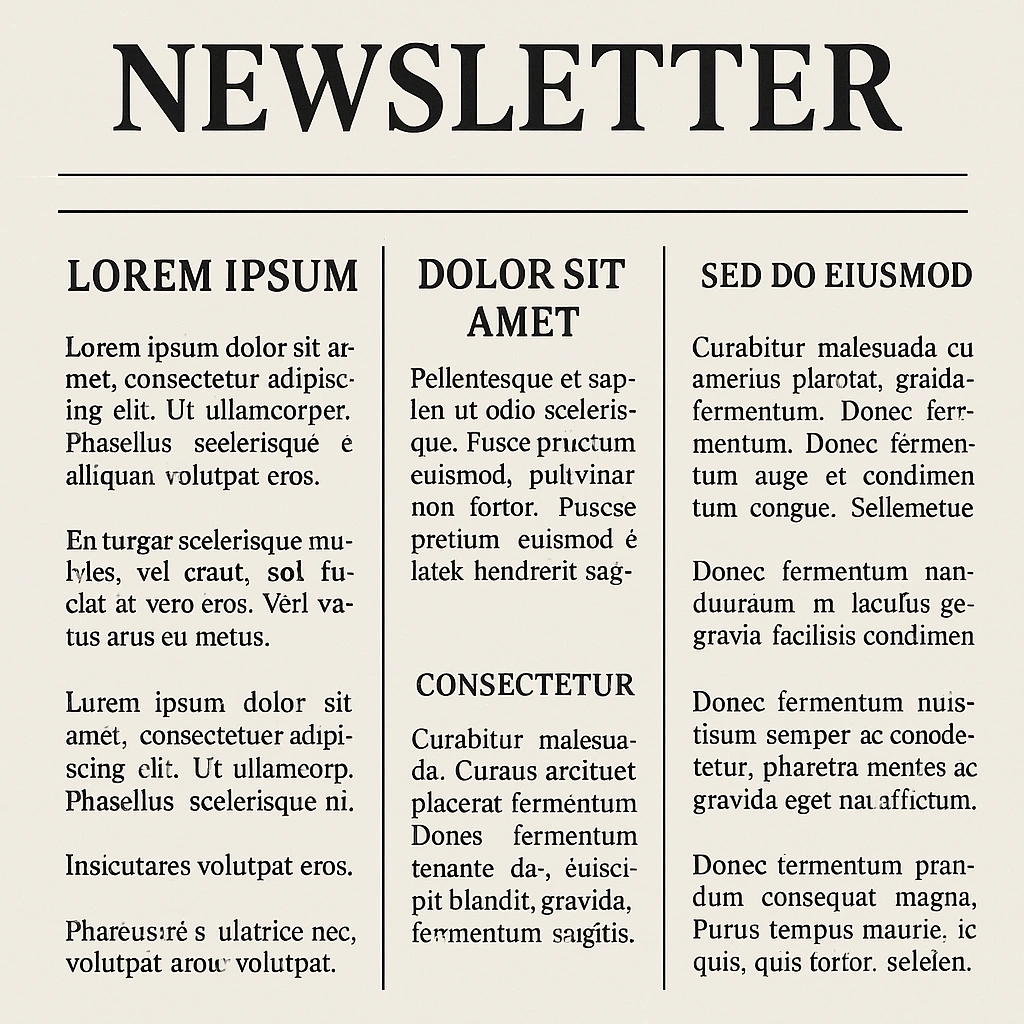
Newsletter columns serve different purposes depending on your content structure and design goals3. Single-column layouts work best for focused messaging and mobile-friendly designs, while multi-column layouts excel at organizing diverse content like news updates, promotions, and article highlights.

The most common newsletter layouts include:
Two-Column Layout: Perfect for balancing text and images, providing clean separation between different content sections
Three-Column Layout: Ideal for news-style newsletters with multiple short articles and varied content types
Mixed Column Structure: Combines single-column headers with multi-column body content for maximum flexibility
Creating Columns Step-by-Step
To set up columns in your newsletter, navigate to the Layout tab and click Columns in the Page Setup section. Word offers preset options for one, two, or three columns, plus the ability to add columns to specific sides of your document.
For more than three columns or custom spacing, select More Columns to access advanced options. Here you can:
- Enable the Line between to add vertical separators between columns
- Adjust Equal column width settings for custom spacing
- Preview changes in real-time
Learn about advanced layout options to enhance your newsletter’s visual structure.
Section Breaks for Mixed Layouts
Professional newsletters often combine different column structures within a single document. Use section breaks to apply different column settings to various parts of your newsletter. Insert section breaks by going to Layout > Breaks > Next Page or Continuous, depending on your needs.
This technique allows you to create newsletters with single-column headers, multi-column body content, and full-width footer sections, providing maximum design flexibility while maintaining a professional appearance.
Mastering Image Wrapping for Visual Impact
Understanding Text Wrapping Options
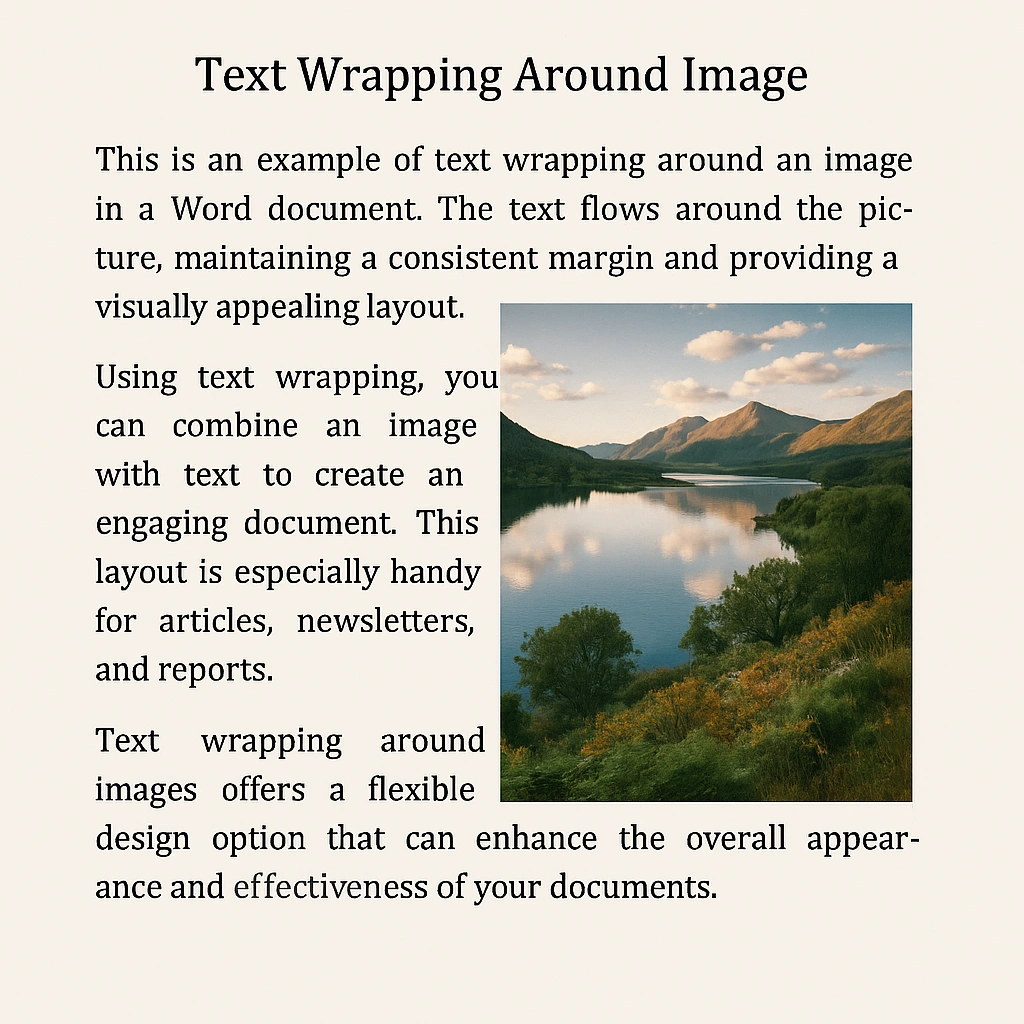
Effective image placement and text wrapping can dramatically improve your newsletter’s visual appeal and readability. Word offers several wrapping options, each serving specific design purposes:
Square Wrapping: Text wraps around the image in a square shape, creating clean boundaries around all sides
Tight Wrapping: Text follows the actual shape of your image, working best with images that have transparent or removed backgrounds
Behind Text: Places images behind text content, useful for watermarks or background effects
In Front of Text: Positions images over text, ideal for overlays and design accents
Top and Bottom: Text appears only above and below the image, with no text on the sides

Implementing Professional Image Wrapping
To apply text wrapping, select your image and use one of these methods:
- Quick Apply: Click the Layout Options button that appears next to your selected image
- Format Tab: Access text wrapping options through Picture Format > Wrap Text
- Position Menu: Use Format > Position for preset positioning with automatic wrapping
For optimal results, ensure your images are appropriately sized before applying text wrapping. Large images may not display wrapped text effectively, so resize by dragging corner handles while maintaining the aspect ratio.
Best Practices for Image Integration
Professional newsletters maintain visual hierarchy through strategic image placement and sizing. Consider these guidelines:
Image Quality: Use high-resolution images that remain crisp when resized
Consistent Styling: Maintain similar image styles, sizes, and treatment throughout your newsletter
White Space: Provide adequate spacing around wrapped images to prevent a cluttered appearance
Mobile Compatibility: Test how your image wrapping appears when viewed on different screen sizes
For detailed image management, explore editing images within Word and inserting images from your computer.
Typography and Visual Hierarchy
Choosing Newsletter-Appropriate Fonts
Typography plays a crucial role in newsletter effectiveness and reader engagement. For email newsletters, stick to web-safe fonts that display consistently across different email clients and devices. Recommended fonts include Arial, Verdana, Helvetica, Georgia, and Times New Roman.
Font Pairing Strategies: Limit your newsletter to two fonts maximum to maintain visual cohesion. Consider pairing a serif font like Georgia with a sans-serif font like Helvetica for balanced contrast.
Size and Spacing Guidelines: Use 14-18 pixel font sizes for body text with a line height at least 1.5 times the font size. This spacing prevents text from appearing as a solid block and improves readability.
Creating Effective Text Hierarchy
Establish a clear information hierarchy through strategic use of headings, subheadings, and body text formatting. Use different font sizes, weights, and styles to distinguish content levels while maintaining consistency throughout your newsletter.
Headings should be larger and more prominent, subheadings smaller than headings but larger than body text, creating a natural reading flow that guides readers through your content.
For comprehensive formatting guidance, check out formatting text in Microsoft Word and best practices for Word formatting.
Advanced Newsletter Techniques
Using Text Boxes for Precise Positioning
Text boxes provide excellent control over content placement, especially for sidebars, quotes, and featured content sections. Insert text boxes through Insert > Text Box, then format them to complement your overall design scheme.
Text Box Benefits:
- Precise positioning independent of column flow
- Easy formatting and styling options
- Perfect for pull quotes and sidebar content
- Seamless integration with image wrapping
Tables for Complex Layouts
Tables offer another approach to newsletter layout, providing structured organization for complex content arrangements17. The easiest way to create newsletter layouts in Word involves using tables to create visual separation and improve readability.
Tables work particularly well for:
- Multi-column layouts with varying content lengths
- Structured information presentation
- Consistent spacing and alignment
- Complex grid-based designs
Learn more about creating tables from scratch and enhancing tables with borders and shading.
Template Creation and Reuse
Save time on future newsletters by creating custom templates from your successful designs1. Save your formatted newsletter as a Word template (.dotx file) through File > Save As > Word Template. This approach ensures consistency across all your publications while reducing design time for future issues.
Explore creating custom templates and using Word’s built-in templates for more template options.
Troubleshooting Common Newsletter Issues
Resolving Layout Problems
Newsletter layouts can sometimes become disrupted during editing. Common issues include text jumping between columns, images displacing text unexpectedly, or formatting inconsistencies.
Quick Solutions:
- Use section breaks to isolate formatting changes
- Apply consistent styles throughout your document
- Check text wrapping settings on all images
- Ensure proper column break placement
For comprehensive help, refer to fixing document layout problems and troubleshooting formatting issues.
Performance Optimization
Large newsletters with multiple images and complex formatting can slow down Word’s performance. Optimize your workflow by:
- Compressing images before insertion
- Working with smaller file sizes
- Using section breaks strategically
- Saving frequently during editing
Conclusion
Mastering newsletter creation in Microsoft Word empowers you to produce professional-quality publications without expensive design software. By understanding column layouts, text wrapping techniques, and typography principles, you can create engaging newsletters that effectively communicate with your audience.
The key to successful newsletter design lies in combining these technical skills with consistent branding and reader-focused content organization. Whether you’re creating internal company communications, marketing materials, or community newsletters, Word’s robust feature set provides everything needed for professional results.
Start with simple two-column layouts and basic text wrapping, then gradually incorporate more advanced techniques as your skills develop. Remember that effective newsletters prioritize readability and visual hierarchy over complex design elements, ensuring your message reaches readers clearly and persuasively.
Frequently Asked Questions
How do I create multiple columns in Word for my newsletter?
Navigate to the Layout tab, click Columns, and select your preferred option (Two, Three, or More Columns for custom settings). You can apply columns to your entire document or specific sections using section breaks.
What’s the best way to wrap text around images in newsletters?
Select your image, click the Layout Options button, and choose Square wrapping for clean boundaries around your image. For images with transparent backgrounds, use Tight wrapping to follow the image’s actual shape.
Which fonts work best for newsletter design?
Stick to web-safe fonts like Arial, Verdana, Helvetica, Georgia, or Times New Roman. Limit yourself to two fonts maximum and use 14-18 pixel sizes for body text with proper line spacing.
How can I make my newsletter look more professional?
Focus on consistent typography, proper use of white space, clear visual hierarchy with headings and subheadings, high-quality images, and a clean layout with adequate margins. Use section breaks to create varied layouts within a single document.
Can I save my newsletter design as a template for future use?
Yes, save your formatted newsletter as a Word template (.dotx file) through File > Save As > Word Template. This preserves your layout, styles, and formatting for future newsletters.
What should I include in newsletter headers and footers?
Headers should contain your logo, newsletter name, issue date, and navigation elements. Footers typically include contact information, social media links, unsubscribe options, and legal information like copyright notices.
How do I fix text jumping between columns unexpectedly?
Use section breaks to control where column formatting applies, check for manual column breaks, and ensure consistent paragraph formatting throughout your document. Avoid mixing different column settings without proper section breaks.
What image formats work best for newsletters?
Use high-resolution JPEG or PNG files. PNG works best for images with transparent backgrounds that you plan to use with tight text wrapping. Always compress images to maintain reasonable file sizes.

