Last Updated: January 24, 2025
In the world of document creation, standing out is more critical than ever. If you’ve ever felt that your reports, letters, or presentations were a bit too mundane, you’re not alone. Personalizing Microsoft Word themes can dramatically enhance your document’s appearance, reflecting your unique style or brand identity, and making a powerful impression on readers. Imagine transforming a standard Word document into a visually striking masterpiece that captivates your audience from the very first glance.
Microsoft Word offers a treasure trove of theme features designed to elevate your documents from ordinary to extraordinary. With just a few clicks, you can customize colors, fonts, and effects, making your content not only visually appealing but also true to your personal or organizational flair. Whether you’re preparing a formal proposal, a creative project, or a simple letter, understanding how to leverage these personalization options can save you time and effort while significantly improving your document’s effectiveness.
In this comprehensive step-by-step guide, we’ll walk you through every aspect of personalizing Microsoft Word themes—from accessing the Themes menu to saving and applying your customized settings. You’ll also discover invaluable tips and best practices to ensure your personalized themes enhance readability, maintain consistency across your documents, and effectively represent your brand for maximum impact. Get ready to take your Microsoft Word documents to the next level with our expert insights!
Table Of Contents
- 1 The Importance of Personalization in Document Creation
- 2 Overview of Microsoft Word’s Theme Features
- 3 Frequently Asked Questions
- 4 Statistics on Document Presentation
- 5 Step-by-Step Guide to Personalizing Microsoft Word Themes
- 6 Tips and Best Practices for Personalizing Microsoft Word Themes
- 7 conclusion
The Importance of Personalization in Document Creation
Have you ever opened a document and felt that something was missing? It might be the overall aesthetic or the vibe that isn’t quite right for the content you’re presenting. Personalizing Microsoft Word themes is not just a cosmetic enhancement; it genuinely impacts how your audience perceives your work. Here are a few reasons why personalization is crucial:
- First Impressions Matter: A well-designed document grabs attention and holds interest. Personalizing themes allows you to create a memorable experience for your readers, setting the stage for the information you’re sharing.
- Professionalism: In a competitive landscape, your documents must reflect your brand’s values and professionalism. Clean, coherent themes speak positively about your work quality.
- Emotional Connection: Colors and design evoke feelings. By choosing the right theme, you can invoke emotions that resonate with your audience, making your content more relatable and impactful.
- Stand Out: Generic templates may blend into the background. Personalizing your Microsoft Word themes ensures your work stands out, making it easier for your audience to remember you.
Overview of Microsoft Word’s Theme Features
Microsoft Word offers a variety of built-in theme features that allow users to alter the look and feel of documents with just a few clicks. Understanding these features will enable you to harness their potential effectively. Here’s a detailed breakdown of what you can expect:
1. Pre-Designed Themes
Microsoft Word comes loaded with pre-designed themes that cater to different styles and purposes. You can access these themes easily from the Design tab. Each theme includes a combination of colors, fonts, and effects that work harmoniously together. But remember, while these are fantastic starting points, the real magic happens when you tailor them to fit your unique requirements.
2. Customizable Color Schemes
Color can dramatically affect how your document is perceived. Microsoft Word allows for a wide array of color customization options, enabling you to select colors that align with your organization’s branding or personal preference. You can manually choose colors or select from the aesthetically pleasing palettes offered by Word.
3. Font Variation
Fonts can convey tone and intent. With Microsoft Word’s theme feature, you can customize font styles for headings, paragraphs, and other text elements. Select a combination that enhances readability while fitting the overall message of your document. Consistency in font selection not only elevates the document’s appearance but also reinforces your brand identity.
4. Effects Variation
Finally, visual effects such as shadows, reflections, and glows can be added to text and objects to produce a more polished and professional appearance. These effects can be manipulated to highlight key information, guiding the reader’s attention effectively.
5. Creating Accessible Documents
Another essential aspect of personalizing your themes is accessibility. Consider how your choices affect all potential readers. Choose high-contrast colors for text and background, ensuring that everyone, including those with visual impairments, can engage with your content meaningfully.
Frequently Asked Questions
Why Should I Personalize My Microsoft Word Theme?
Personalization helps communicate your message more effectively while reinforcing your brand. It makes documents appealing, easier to read, and ensures you leave a lasting impression on your audience.
Does Personalizing Themes Affect Document Compatibility?
While Word documents with personalized themes can be shared with others, it’s essential to remember that the recipient may not have your specific fonts or colors. To maintain document integrity, consider including a PDF version when sharing with those who may not have the same settings.
Can Personalization Help in Team Collaboration?
By using a customized theme uniformly across team documents, you create coherence that simplifies collaboration. A unified look helps members of your audience focus on content rather than design differences.
Statistics on Document Presentation
It’s estimated that 70% of people form an opinion about a document within the first 30 seconds of viewing it. This statistic underscores the importance of effective design and personalization in your document creation process. A well-structured and visually appealing document can significantly improve its reception and comprehension.
Additionally, applications of optimized document aesthetics can yield impressive results. Reports show that documents utilizing customized themes experience up to 60% higher engagement rates compared to those that use basic templates. This highlights the need for personalization in achieving targeted outcomes in communication. By tailoring your Microsoft Word theme, you’re not just decorating; you’re strategically enhancing engagement.
Personalizing Microsoft Word themes opens doors to various creative opportunities, ensuring your documents are not only visually appealing but also effective in their communication goals. By utilizing these theme features efficiently, you can transform everyday documents into compelling pieces that capture attention and drive clarity.

Step-by-Step Guide to Personalizing Microsoft Word Themes
To kick off the journey of personalizing Microsoft Word themes, the first step is gaining access to the Themes menu. Start by opening Microsoft Word and selecting the document you wish to personalize. Here’s how you can navigate with ease:
1. Open Word: Launch Microsoft Word and create a new document or open an existing one.
2. Navigate to the Design Tab: Look for the ‘Design’ tab on the toolbar at the top of your screen. This is your gateway to all theme-related options.
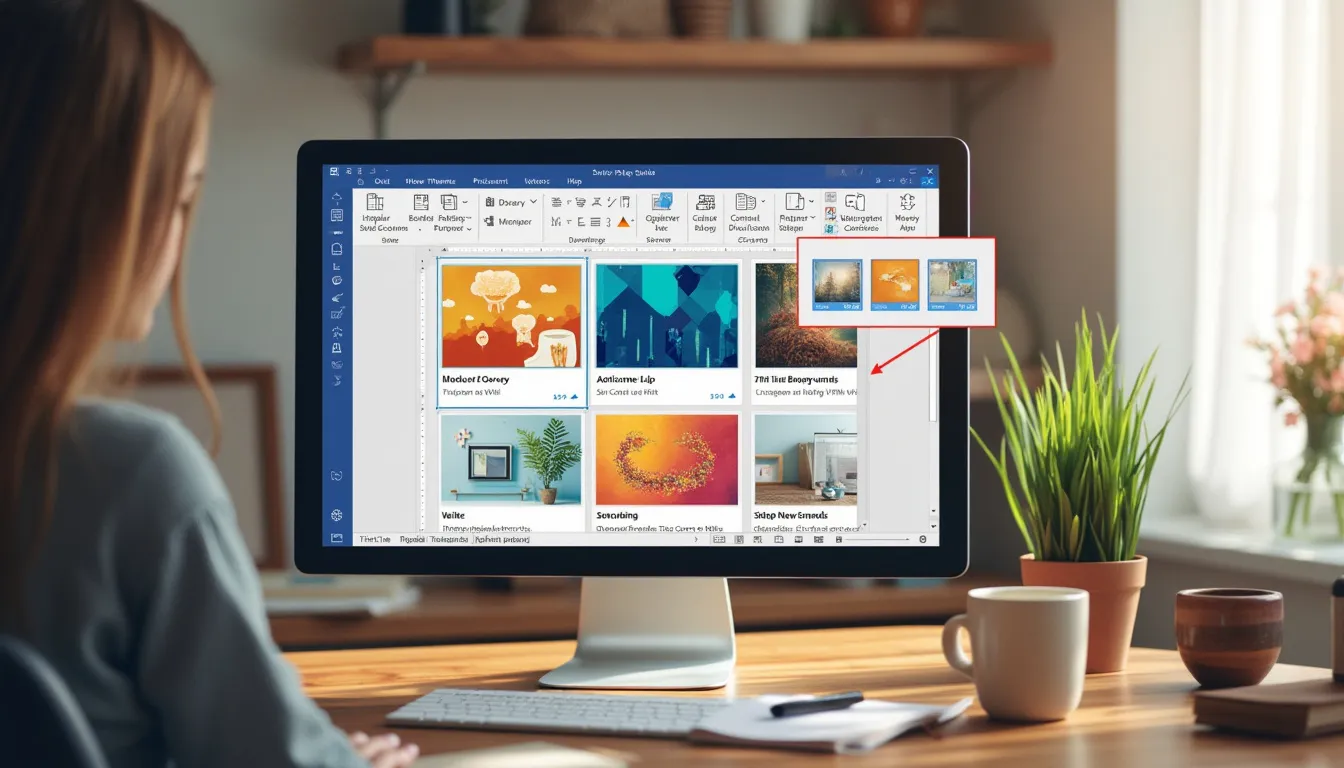
3. Select Themes: Within the Design tab, you will find the ‘Themes’ group. Click on it, and a dropdown menu will appear showcasing a variety of preset themes. You’ll find themes categorized under Classic, Modern, and more—explore these options to envision how each can transform your document.
Understanding how to navigate this menu is crucial. Here’s a quick tip: hover over each theme to preview how it will look in your document! This instant feedback can guide your choice for the most aesthetically pleasing results.
Customizing Colors, Fonts, and Effects
Now that you’re in the Themes menu, it’s time to dive deeper into personalizing Microsoft Word themes by customizing colors, fonts, and effects. This is where your creative flair can shine!
1. Customize Colors:
Click on the ‘Colors’ dropdown in the Themes group. You can either select a pre-defined color palette or click on ‘Customize Colors’ at the bottom of the list. Here’s how:
– Choose colors that reflect your personality or brand. For instance, blue tones convey trust, while red can evoke excitement.
– Create a custom palette by selecting individual colors for text, background, hyperlinks, and more. This tailoring can make your document stand out uniquely.
2. Select Fonts:
Next, click on the ‘Fonts’ dropdown. Here are some quick tips to choose the right font combinations:
– Aim for readability. For body text, consider serif fonts like Georgia or sans-serif fonts like Arial for clarity.
– Pair contrasting fonts. A decorative font can be paired with a clean, simple one for titles and body text to maintain visual appeal.
3. Adding Effects:
Lastly, effects can elevate your document’s theme. These can be found in the ‘Effects’ dropdown. You may want to include:
– Shadows for depth, giving your elements a more three-dimensional feel.
– Reflections for a touch of sophistication, perfect for professional documents or presentations.
By combining color, font, and effects thoughtfully, you create a cohesive and vibrant theme tailored to your preferences.
Saving and Applying Your Personalized Theme
With your colors and fonts in place, it’s essential to save your hard work! Here’s how to seal the deal in personalizing Microsoft Word themes:
1. Save Your Theme:
Once you’ve made your customizations, head back to the Themes dropdown. Click on the Save Current Theme option.
– Assign a Name: A dialog box will prompt you to name your theme. Choose something memorable that reflects your brand or style.
– Save Location: Ensure it’s saved in the default location (or another easily accessible folder) so you can apply it later without hassle.
2. Applying Your Theme:
Whenever you create a new document, you can apply your personalized theme easily:
– Go to the ‘Design’ tab and click on ‘Themes.’
– Find the ‘Custom’ section where your saved theme should appear.
– Simply click on it, and watch your new theme instantly transform your document in seconds!
### Key Takeaways
Personalizing Microsoft Word themes isn’t just about aesthetics; it can greatly enhance readability and user engagement. Whether for personal use or professional branding, a well-thought-out theme can leave a lasting impression on your audience. Here are some compelling statistics to consider while customizing:
– According to research, documents with well-chosen colors can increase motivation and engagement by 25%.
– Studies show that visually engaging content can lead to a 60% higher retention rate in readers.
By following this step-by-step guide, you not only personalize Microsoft Word themes effectively but also create documents that are visually captivating and tailored to your needs. Get started today, and watch your presentations come to life as you inject your unique style!

Tips and Best Practices for Personalizing Microsoft Word Themes
Choosing Themes That Enhance Readability and Aesthetics
When personalizing Microsoft Word themes, the first crucial step is selecting a theme that balances readability with aesthetic appeal. The right combination can significantly impact how your content is perceived. Aim for contrast between the text and background to ensure that your readers can digest the information effortlessly.
Key Considerations:
– Font Size and Type: Opt for fonts that are easy to read. For body text, consider using classic sans-serif options like Arial or Calibri, as they provide clarity. Reserve more stylistic fonts for headings or quotes for added emphasis.
– Color Scheme: Choose a color palette that is visually pleasing and conducive to reading. Dark text on a light background generally offers the best legibility. According to a study by MIT, the optimal color contrast enhances reader engagement by up to 70%.
– Spacing and Alignment: Don’t underestimate the power of white space. Adequate line spacing and paragraph spacing can make your document less cluttered and easier to navigate.
By adhering to these guidelines, you’ll not only enhance the visual appeal of your document but also ensure that it remains reader-friendly.
Maintaining Consistency Across Documents with Custom Themes
One of the biggest advantages of personalizing Microsoft Word themes is the ability to maintain brand consistency. Frequent use of varied themes can confuse your audience, but implementing a custom theme across all documents creates a unified look.
Important Strategies:
– Save and Reuse Themes: After creating a custom theme, save it to your list of available themes. This ensures that you can easily apply it to future documents. By creating a “Brand Kit” of themes that reflect your or your organization’s brand colors and styles, you can guarantee that consistency becomes effortless.
– Use Templates: Consider creating document templates based on your custom themes. This way, every time you start a new project, you already have a consistent foundation in place. Templates can also include pre-set font styles, sizes, and colors.
– Regular Updates: Business branding can evolve. Make it a habit to review and modify your themes periodically to keep your materials looking fresh and aligned with your current branding strategy.
Consistency not only enhances professionalism but also bolsters brand identity, which ultimately leads to greater trust from your audience.
Leveraging Theme Personalization for Branding and Professional Presentations
Personalizing Microsoft Word themes is an invaluable tool for amplifying your brand in documents and presentations. A well-designed document can leave a lasting impression, establishing credibility and authority in your field.
Proven Techniques:
– Incorporate Brand Elements: Make use of your organization’s colors and logos within your theme. Tailoring your theme to mirror your brand’s identity strengthens the overall message and enhances brand recall. According to a branding study, consistent branding can increase revenue by up to 23%.
– Visual Hierarchy: Utilize a clear visual hierarchy through your headings, subheadings, and body text. By doing this, you not only improve readability but also guide your audience through the logical flow of your document. Use larger or bolder fonts for headings and softer styles for subheadings to create a polished look.
– Professional Touch: For formal presentations, ensure that your theme can adapt to both screen and print formats. Test how your themes appear in different layouts and ensure that your designs do not compromise the integrity of visuals in your documents.
By leveraging theme personalization effectively, you will boost your presentation quality significantly, drawing positive attention and engagement from your audience.
Key Takeaways for Success
– Experiment and Adapt: Don’t hesitate to try out different combinations of colors and fonts. The beauty of Word’s customization options is the freedom they provide. Test various setups until you find what resonates best with your personal style and audience preferences.
– Stay Informed About Trends: Design trends shift; keep yourself updated to ensure your documents are modern and appealing. Follow design blogs and utilize resources like Canva or Adobe Color to understand what’s currently in vogue.
– Solicit Feedback: Finally, don’t shy away from seeking opinions from peers or colleagues. Constructive criticism helps refine your ideas and leads to better engagement with your audience.
By following these tips and best practices while personalizing Microsoft Word themes, you’ll not only enhance your document creation process but also elevate your professional image. Remember, personalization is key—make your documents stand out and reflect who you truly are!
conclusion
Personalizing Microsoft Word themes not only enhances your document creation experience but also allows you to express your unique style or brand identity effectively. Following the comprehensive step-by-step guide outlined above, you can easily access and navigate the Themes menu, customize colors, fonts, and effects, and save your personalized themes for future use. By taking the time to customize your documents, you’re not just creating visually appealing materials; you’re also ensuring that they align with your message and resonate with your audience.
Remember, every detail counts in document creation. Choosing themes that improve readability and maintain a coherent aesthetic can significantly elevate the professionalism of your work. Moreover, leveraging personalized themes can serve as an invaluable tool for establishing your brand presence, ensuring that your documents consistently communicate your values and identity.
Implementing these best practices can lead to a more streamlined workflow and enhance the impact of your presentations, making a lasting impression on your readers and clients. So, take action today by diving into Microsoft Word and crafting themes that reflect your vision! Don’t miss out on the opportunity to elevate your business communications and personal projects alike. By making a commitment to personalization, you’re setting the stage for success in every document you create.


