
Are you tired of the same old default font in Microsoft Word? Do you want to add a touch of personalization to your documents? You’re not alone! Customizing your font is one of the easiest ways to enhance your document’s overall look and feel. Whether you’re working on a professional report, a creative project, or a simple letter, the font you choose can convey your message more effectively and even reflect your unique style.
In this comprehensive guide, we will walk you through the essential steps for changing the default font in Microsoft Word. From accessing the Font settings to selecting the perfect typeface that meets your needs, every detail will be covered. Plus, we’ll provide tips and best practices to ensure your documents maintain a cohesive and polished appearance. Ready to discover the power of typography at your fingertips? Let’s dive in!
The Importance of Customizing Fonts for a Personalized Document Experience
Customizing your fonts in Microsoft Word isn’t just a minor detail; it profoundly impacts your document’s overall presentation. When you set a default font, you’re enhancing not only your writing but also your reader’s experience. Fonts can convey emotion, establish professionalism, and improve readability. Research shows that people spend an average of 7.4 seconds viewing a document before deciding its relevance. This staggering fact emphasizes the need to make a strong first impression using the right font.
For example, using a sleek, modern font such as Calibri or Arial can evoke clarity and professionalism, while a playful font like Comic Sans may suggest creativity but can come off as informal in a business setting. By customizing the default font in Microsoft Word, you can ensure every document you create aligns with your brand identity and communicates the right message.
Moreover, a consistent font throughout your documents contributes to your work’s cohesiveness. When your audience encounters documents featuring various fonts, it may create confusion or distract from your content. This personalization not only solidifies your message but also builds trust with your readers. A well-structured document is synonymous with professionalism—an essential factor in establishing credibility.
Overview of the Steps Involved in Changing the Default Font
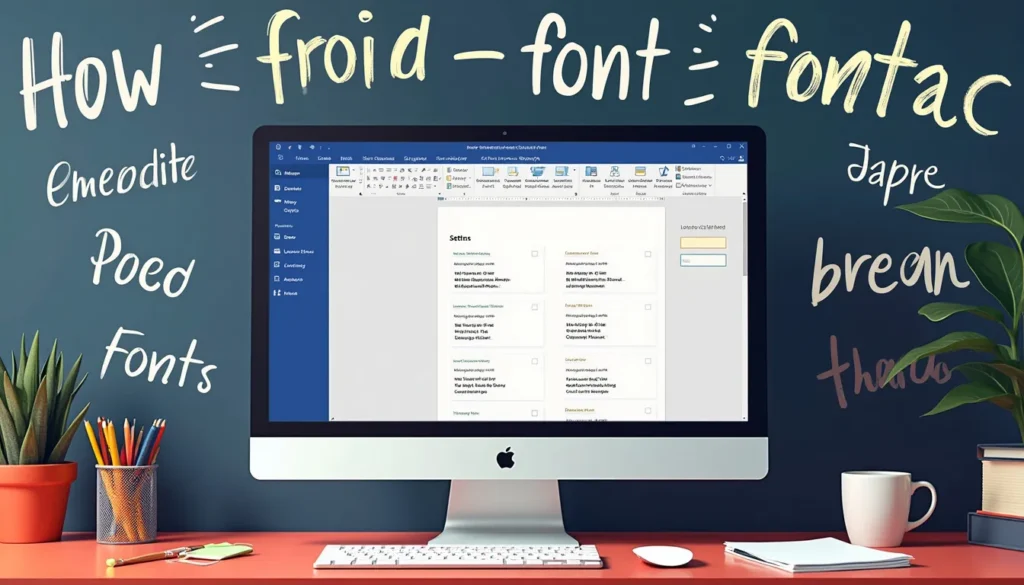
Changing the default font in Microsoft Word is a straightforward process that can be done in just a few steps. Below is an overview of what to expect when embarking on this customization journey:
1. Accessing the Font Settings: You’ll begin by finding and opening the Font settings within Microsoft Word. This location can typically be found in several ways, either via the Home tab or using a keyboard shortcut.
2. Choosing Your Desired Font: Once you’ve accessed the settings, this is the time to explore various font options. Whether you prefer elegant serif fonts like Times New Roman or clean sans-serif types, the possibilities are virtually endless.
3. Saving Changes: After selecting your preferred font, size, and even additional styling options such as bold or italics, you’ll need to save these changes. This will ensure that your new default font is applied to all future documents.
By familiarizing yourself with these steps, you are preparing to not just create aesthetically pleasing documents but also ensure that your future document creation process is expedited.
Changing the default font in Microsoft Word is an often overlooked feature that can have lasting implications for your work and branding. The intuitive interface allows for quick changes that ultimately save time and promote a consistent writing style.
In the next section, we will dive deeper into the step-by-step guide to effectively change the default font, explore additional customization options, and ensure that your documents are always presented in a style that reflects your personality and professionalism. Remember, the power of choice lies in your hands, and every decision you make about how your documents are presented speaks volumes about you as a writer.

Step-by-Step Guide to Change the Default Font
Accessing the Font Settings in Microsoft Word
Changing the default font in Microsoft Word begins with navigating to the Font settings. Here’s a simple breakdown to help you find your way:
1. Open Microsoft Word: Launch the application as you normally would.
2. Navigate to the Home Tab: Once your document is open, look for the top menu bar and click on the Home tab. This section contains the bulk of formatting options you’ll need.
3. Open the Font Dialog Box: In the Home tab, you’ll see the Font group, which displays the current font type and size. To customize, click on the small arrow in the bottom right corner of the Font group. This will open the Font dialog box where you can tailor your font preferences.
Choosing the Desired Font, Size, and Styling Options
With the Font dialog box open, you’ll find a range of options. Here’s how to make your selections effectively:
- Selecting a Font: Use the dropdown menu under Font to scroll through and choose your ideal font. Keep in mind that certain fonts convey professionalism and readability better than others. For business documents, fonts like Arial, Calibri, and Times New Roman are often preferred.
- Setting the Size: Next, adjust the Size dropdown to specify your desired text size. A standard size for body text is between 10 to 12 points, but this can vary depending on the document type. For headings, consider using sizes between 14 to 18 points to emphasize importance.
- Styling Options You can also choose bold, italics, underline, and strikethrough from the Font dialog box. Don’t forget to explore additional options like font color, highlighting, and effects (such as superscript or subscript) depending on your document’s needs.
- Preview Your Selections: Before finalizing, make use of the preview area in the dialog box. This allows you to see how your font choices will look on the page, helping you ensure that they align with your expectations.
Saving Changes to Set the New Default Font
Once you’ve selected the ideal font and styling options, it’s time to save your changes as the new default. Here’s how you can do this effortlessly:
1. Click on Set As Default: In the Font dialog box, look for the Set As Default button. This allows you to apply your chosen font settings not just to the current document but also to all new documents moving forward.
2. Choose the Option That Suits Your Needs: A prompt will appear asking if you want to set the default for:
– This document only
– All documents based on the Normal template
If you want this font to be the standard across all your documents, select “All documents based on the Normal template.
3. Confirm Your Changes: After making your selection, click OK to confirm. Your new default font settings will now be saved!
4. Test It Out: To ensure that your new default font is set, start a new document. You should see your chosen font style and size automatically applied.
By following this step-by-step guide on changing the default font in Microsoft Word, you’re not just personalizing your documents – you’re also enhancing the overall readability and visual appeal. Imagine the impression you leave with consistently formatted documents that reflect your style and professionalism!
In addition, these personalized settings can save time for future projects, as you won’t have to remember to reformat every new document. Instead, you’ll be ready to write and create right away!
FAQ Section
Q: Can I change the font in an already existing document?
A: Yes! While this guide focuses on setting a default font for future documents, you can always change the font in current documents by selecting the text and changing the font from the toolbar or the Font dialog box.
Q: What if I want to revert to the original default font?
A: If you wish to revert your changes, you can go to the Font dialog box, select the original font and size (like Times New Roman 12 point), and then repeat the ‘Set As Default’ process.
Q: How do different versions of Word affect changing fonts?
A: While the basic process remains the same across different versions of Microsoft Word, some user interfaces may vary slightly. However, Microsoft typically retains a similar layout for Font settings, so you should be able to find the necessary options easily.
By grasping these fundamental steps, anyone can effectively change the default font in Microsoft Word and elevate their document presentation to new heights!

Tips and Best Practices for Font Selection
1. Recommendations for Professional and Readable Fonts
Selecting the right font is crucial for conveying your message effectively. When changing the default font in Microsoft Word, consider using fonts that enhance readability and professionalism. Here are some expert recommendations:
- Arial: A classic sans-serif typeface, Arial is clean and easy to read on both print and digital formats. It’s a favorite among business professionals for its minimalistic design.
- Times New Roman: This traditional serif font is widely used in formal documents and is known for its classic appeal. Its structured design offers clarity and sophistication.
- Calibri: If you’re looking for a modern font, Calibri is an excellent choice. It’s the default font in many versions of Microsoft Word for a reason – it’s sleek and versatile.
- Garamond: Known for its elegant curves, Garamond is another serif font that combines style with readability. It’s particularly great for academic papers and longer documents.
- Verdana: With its large letters and generous spacing, Verdana is designed for on-screen reading, making it an excellent choice for digital documents.
When selecting a font, think about your audience and the purpose of your document. A professional report may call for a more formal typeface, while a creative project might benefit from a more artistic font.
2. Ensuring Consistency Across Documents Using Default Settings
Maintaining font consistency across all of your documents is essential for building a professional image and enhancing readability. Here’s how to ensure consistent font usage once you’ve changed your default font in Microsoft Word:
- Set Default Styles: Aside from changing the default font, consider setting default paragraph styles. This ensures that headings, subheadings, and body text all utilize a consistent typeface.
- Create a Template: If you regularly create similar documents, use this new default font to build templates. Save these templates in your Word settings for quick access in the future.
- Limit Font Variants: Using too many different fonts or styles in one document can be distracting. Choose 2-3 complementary fonts (for example, one for headings and one for body text) to maintain a cohesive look.
- Regular Review: Periodically review your documents to ensure compliance with your chosen standards. It’s easy to revert to old habits, especially if other fonts are embedded in older templates.
By creating a uniform document structure, you’ll help enhance the professionalism of your work. This attention to detail not only improves readability but also reinforces your brand identity in professional environments.
3. Troubleshooting Common Issues When Changing the Default Font in Microsoft Word
Changing the default font in Microsoft Word should be a straightforward process, but users often encounter a few common hiccups. Here are troubleshooting tips to resolve these issues:
- Font Not Changing Across All Documents: Ensure you’ve set the font as the default in Key Home > Font > Set As Default. If you chose This document only, it will not apply to new documents. Opt for All documents based on the Normal template instead.
- Changes Not Saving: If your font changes don’t seem to stick, make sure you’re using the right version of Microsoft Word. Updates may affect how settings are saved. Consider checking for updates or even repairing your Microsoft Office installation.
- Document Formatting Issues: When opening shared documents, previously used fonts may not appear the same due to differing font installations. To avoid issues, stick to widely available fonts or use Embed Fonts in the save options.
- Previous Fonts Still Showing Up: If your previous default font appears in new documents after your changes, restarting Word can help enforce the new settings. In some cases, a reboot of your computer may also be necessary.
- Spacing and Alignment Problems: Sometimes, changing the font may also affect the overall spacing and alignment of your text. Check paragraph settings and re-align as necessary to maintain a clean look.
By being proactive and addressing these common issues, you can ensure a smoother experience when changing the default font and maintaining a professional look in all your documents.
In conclusion, selecting the right font is more than just an aesthetic choice; it impacts the readability and professionalism of your documents. Following these tips and best practices can help you make informed decisions, establish consistency, and prevent potential issues as you customize your fonts in Microsoft Word. Don’t hesitate to experiment with different fonts and styles to find the perfect fit for your needs!
Conclusion
Changing the default font in Microsoft Word is not just a simple task; it’s a valuable enhancement that can greatly improve the overall look and feel of your documents. By personalizing the font selection, you tailor your writing experience to better reflect your unique style and the needs of your audience. Whether you’re preparing a professional report, crafting an academic essay, or putting together an informal invitation, the right font can make all the difference in communication.
Taking the few minutes required to adjust your font settings will ensure that every new document you create instantly embodies your preferred aesthetic. With our step-by-step guide, you’ve learned how to access the font settings, select your desired style, and save these changes effectively, making it easier than ever to maintain consistency in your work.
As you implement these changes, remember to consider compatibility and readability to enhance the professionalism of your documents. Opting for widely used fonts such as Arial or Times New Roman can help guarantee that your text is easily accessible and visually pleasing to all readers. In case you encounter any hurdles along the way, our troubleshooting tips will assist you in swiftly resolving common issues.
Now that you have the knowledge and the tools to change the default font in Microsoft Word, don’t hesitate to take that next step! Enjoy the benefits of customized typography and stand out in your professional or personal endeavors. Start applying these insights today, and watch how your documents ascend to a new level of sophistication and clarity. Happy writing!