Creating labels can be a time-consuming task, but did you know that Microsoft Word can make it super easy? If you’ve ever wondered how to get started with label templates in Microsoft Word, you’re in the right place! In this blog post, we’ll cover everything you need to know to make labels effortlessly – whether for mailing, organizing, or any other purpose. Let’s dive in!
What Are Label Templates in Microsoft Word?
Label templates are pre-designed formats that you can use to print your labels quickly and easily. Instead of manually adjusting margins and trying to fit text into tiny boxes, label templates in Word help make sure everything lines up perfectly every time. Microsoft Word offers a wide range of built-in label templates for mailing addresses, file organization, name tags, and much more.
Label templates are a lifesaver when you need professional, uniform labels without the stress of designing them yourself. Let’s explore how you can use these templates effectively!
How to Access Label Templates in Microsoft Word
1. Start with the Mailings Tab
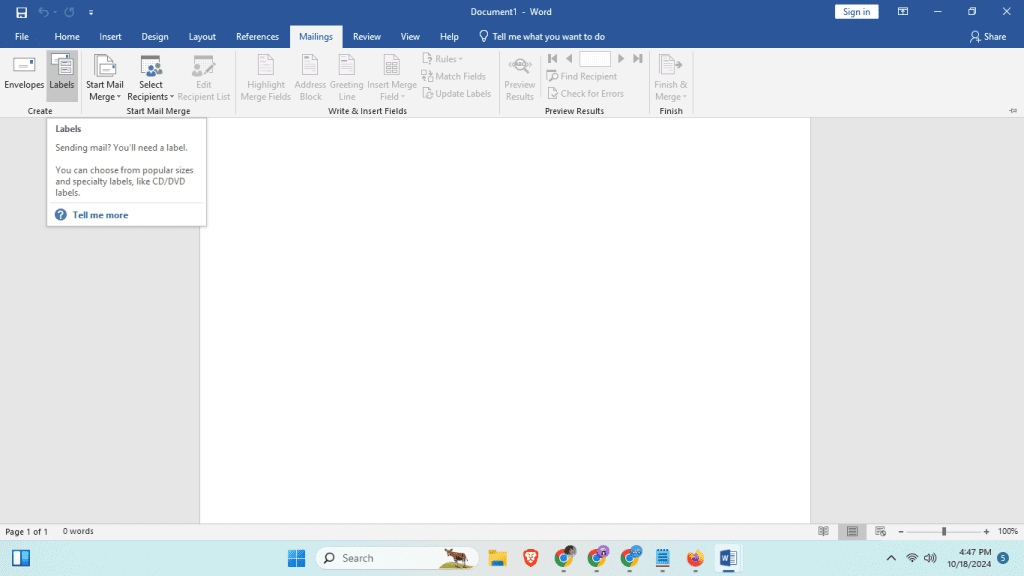
To begin, open Microsoft Word and navigate to the “Mailings” tab. This tab contains all the tools you’ll need for labels and mail merges.
- Click on “Labels” under the “Mailings” tab. A new window will pop up titled “Envelopes and Labels.”
- Here, you can type in the address or text you’d like to be printed on the label.
2. Select a Label Template
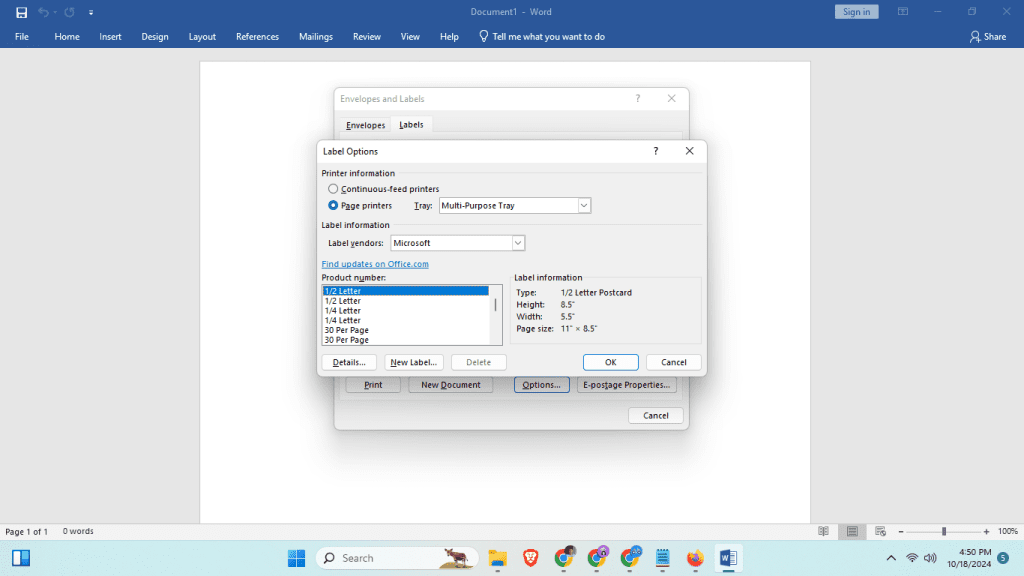
Next, click on “Options” to choose the label template you need. Microsoft Word works with popular label brands, including Avery and Staples, making it easy to select the exact size and type you’re using.
- Choose the brand and the product number from the list. You can find the product number on the packaging of your label sheets. Once you have selected it, Word will apply the correct dimensions for your label.
For more detailed instructions, check out our guide on downloading third-party templates in Microsoft Word.
3. Customize Your Labels
If you want your labels to stand out, you can easily customize them by adding fonts, colors, logos, or even images. Just type in your text and use the formatting tools available under the “Home” tab to make it unique. Want to create a holiday-themed label? Change the colors and add some clip art – the possibilities are endless!
For more tips on creating personalized labels, you might find our post on customizing cover page templates in Microsoft Word helpful.
4. Preview and Print
Before printing, always make sure to preview your labels. Click “New Document” after setting up your label options. This creates a document with your labels laid out as they will be printed, allowing you to make any last-minute adjustments.
When everything looks perfect, insert your label sheets into the printer and hit “Print.” Make sure your settings are correct, and always run a test print if you’re using custom label sizes.
Tips for Using Label Templates Like a Pro
1. Use High-Quality Label Paper
The quality of your label paper can significantly affect how your finished product looks. Make sure to choose high-quality label sheets to ensure professional results every time.
2. Align Your Printer Settings
Printer alignment is crucial. Labels can get easily misprinted if the alignment settings are off. Always adjust the paper size in your printer settings and do a test print on regular paper before printing directly on the label sheet.
3. Save Custom Templates
If you’ve customized a label template and you’re happy with it, save it! You can easily save your document as a Word Template (.dotx) for future use, saving you time and effort when you need similar labels again.
For more information on modifying templates, visit our guide on how to modify existing templates in Microsoft Word.
4. Batch Print for Efficiency
Printing labels in bulk can save time. Instead of printing each label individually, enter all the addresses or text at once. You can use Microsoft Word’s Mail Merge feature to import data from Excel and automatically fill in multiple labels.
Frequently Asked Questions About Using Label Templates in Word
Can I Use Custom Dimensions for My Labels?
Yes! If your label sheets don’t match the pre-set templates, you can manually enter the dimensions in the “Label Options” dialog. This allows you to create custom labels that fit your unique needs.
What Types of Labels Are Available?
Microsoft Word supports a wide variety of label types, from address labels to CD labels and name tags. You can find templates for nearly any labeling need.
How Can I Make My Labels More Creative?
To make your labels stand out, you can add elements like background colors, borders, and even your company logo. Experiment with fonts, icons, and other design elements to make your labels visually appealing.
Conclusion: Get Started with Label Templates Today!
Using label templates in Microsoft Word is an easy and efficient way to create well-designed labels without the hassle of manual formatting. With the tips provided in this blog, you can quickly make professional labels for any occasion – whether for personal projects or office needs. The next time you need labels, give Microsoft Word’s Official Template Library a try, and watch how much time you save.