In today’s digital landscape, gathering, organizing, and retrieving research materials can be overwhelming. OneNote Web Clipper streamlines this by letting you capture web pages, articles, and images directly into OneNote—then finish cleanly in Microsoft Word when it’s time to deliver.
This guide covers installation, every clip mode (and when to use it), practical workflows to turn clips into polished Word documents, and fixes for common hiccups.
What Is OneNote Web Clipper?
OneNote Web Clipper is a free browser extension (officially supported on Microsoft Edge and Google Chrome) that allows you to clip the full page or just the article/recipe/product information you need. You can save the result to a chosen OneNote notebook/section and access it across devices.
Note on Firefox: Microsoft removed the official OneNote Web Clipper from Firefox in 2023. Community alternatives exist (e.g., oneClipper), but they’re not the official Microsoft extension. For best results, use Edge or Chrome.
Installation & First‑Run Setup (Edge & Chrome)
Edge (Windows/Mac)
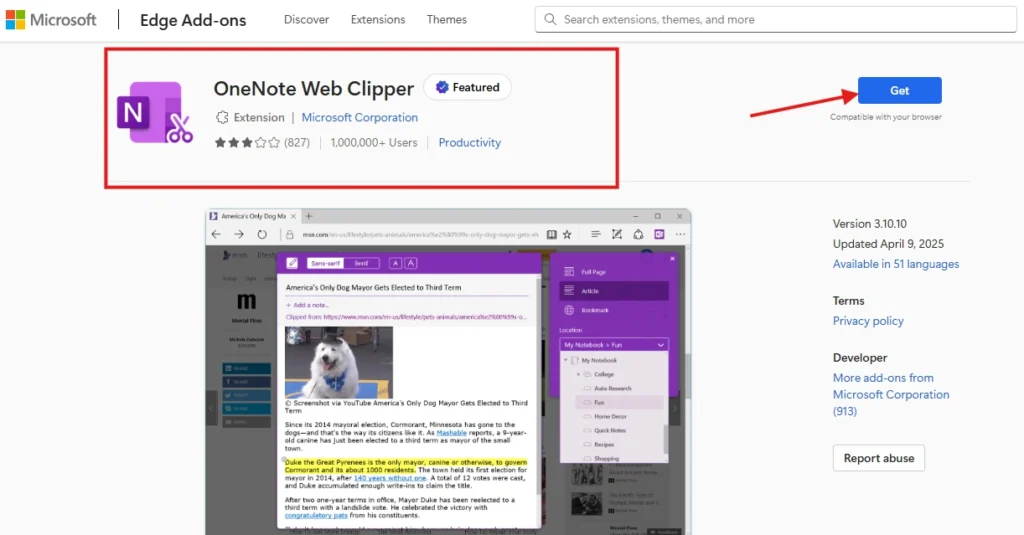
- Open the OneNote Web Clipper page in the Edge Add‑ons store.
- Click Get and confirm.
- Sign in with your Microsoft account in the extension popup.
Chrome (Windows/Mac/Linux/ChromeOS)
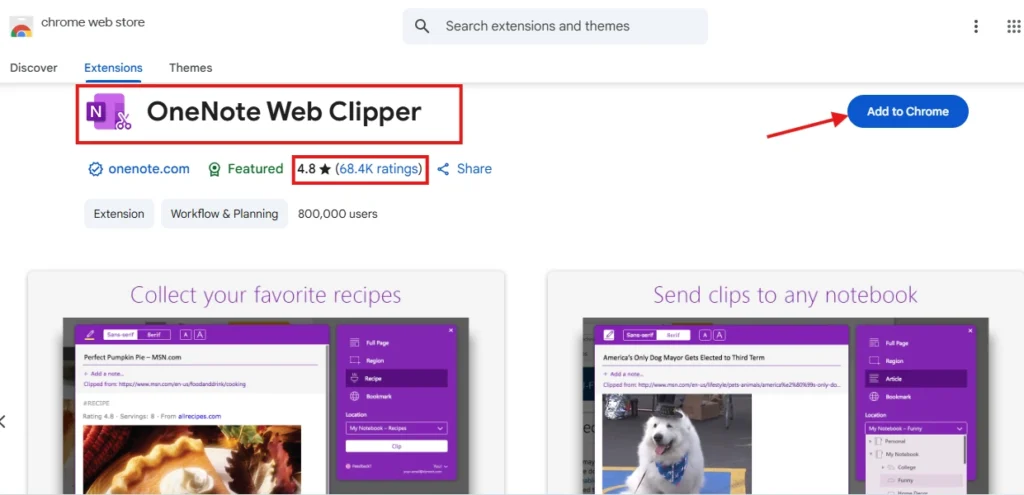
- Open the OneNote Web Clipper listing in Chrome Web Store.
- Click Add to Chrome → Add extension.
- Sign in with your Microsoft account in the extension popup.
First‑run tips
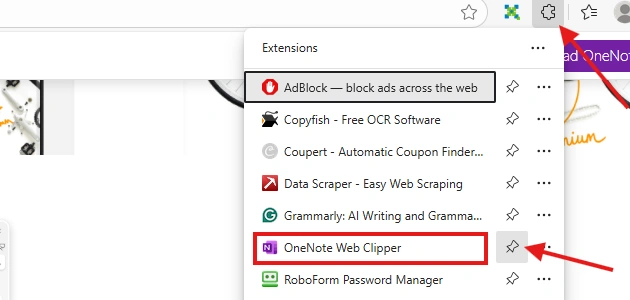
- Pin the extension so it’s one click away.
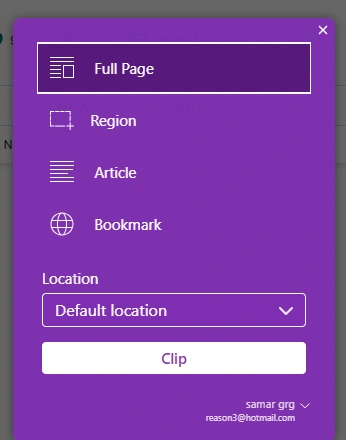
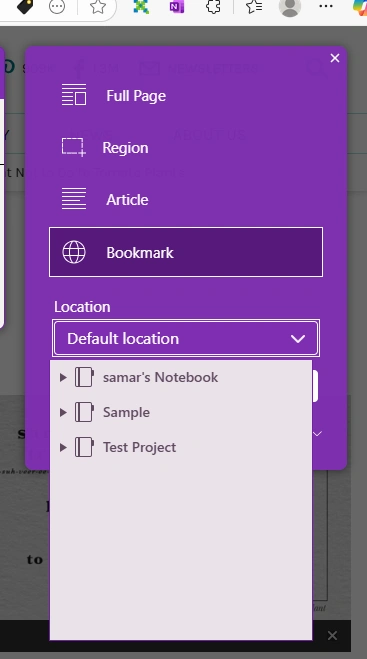
- Pick a default location (notebook/section) in the clip dialog; you can override it per clip.
- The official “Getting started” page is a handy reference if anything looks different on your system.
Clip Modes (and when to use each)
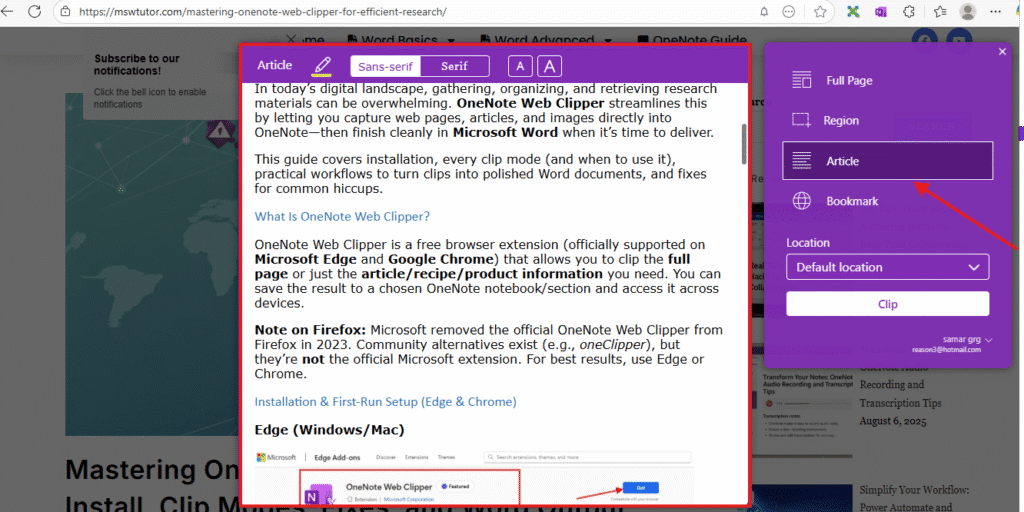
Article
Simplifies the page to text + in‑line images. Perfect for reading and quoting later. If your final deliverable is a Word document, Article mode usually produces the cleanest text to style with Word’s headings and normal body styles.
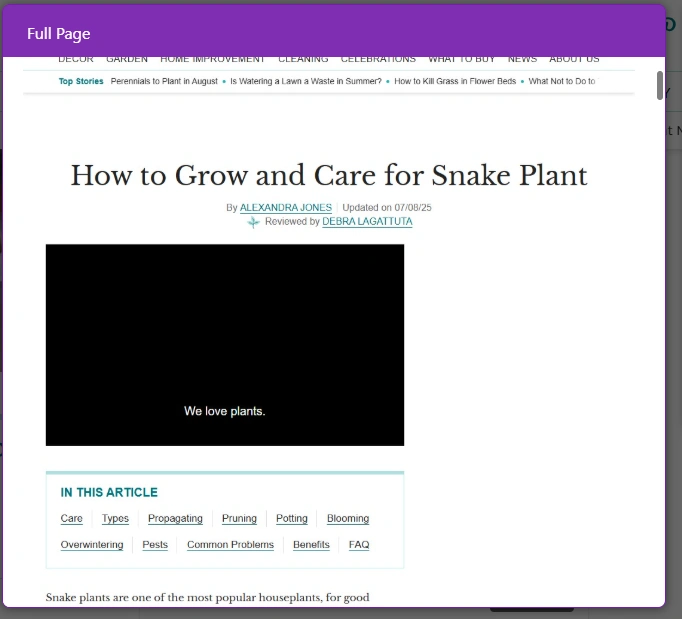
Full Page
Captures a screenshot of the entire page—great for legal/design research where fidelity matters, or when sites block content extraction. You’ll likely annotate this image in OneNote or Word rather than reflow text.
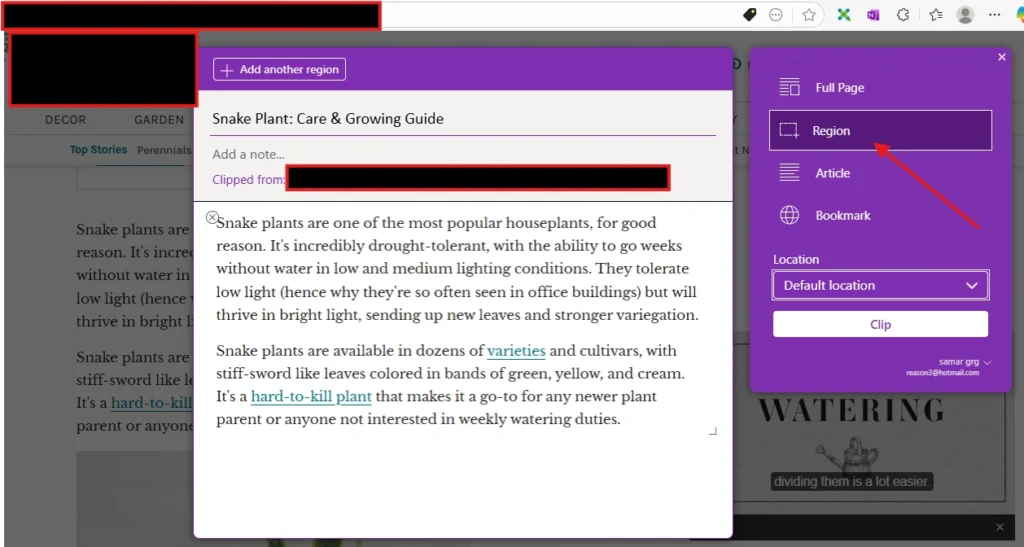
Region
Draw a box and grab just the part you need (charts, diagrams, code blocks). Handy for building visual briefs or step‑by‑step references.
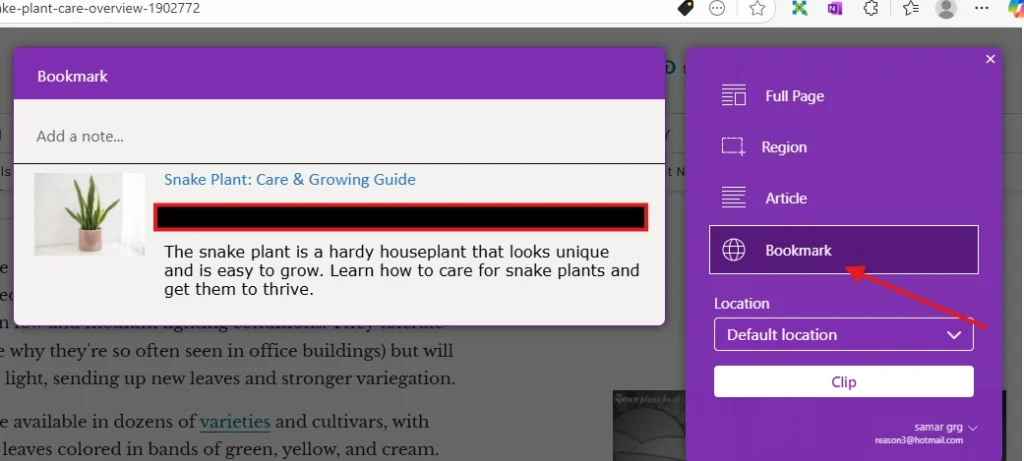
Bookmark
Saves a compact card with title, image, and URL. Ideal for link roundups and “read later” lists.
Organize Your Clippings (so you can find them fast)
- Notebook structure: Create project notebooks (e.g., Market Analysis Q3 2025) and sections like Data Sources, Key Findings, and Quotes.
Use our professional OneNote templates and page layouts to structure your research notebooks consistently.
- Page naming: Use
YYYY‑MM‑DD – Source – Topic(e.g.,2025‑08‑10 – WHO – TB report). - Tags in OneNote: Apply To-Do, Important, Question, Quote tags after clipping to drive search and reviews. Speed up this process with OneNote keyboard shortcuts for maximum efficiency.
- Choose location on clip: In the clip panel, select the exact notebook/section before clicking Clip so content lands where you expect.
Turn Clips into a Polished Word Document (3 reliable workflows)
Workflow A — Article → Word (cleanest text)
- Clip with Article mode.
- In OneNote, open the clipped page.
- Copy/paste into Word or use File → Export in the Windows desktop OneNote app where available (see note below).
- In Word, apply Styles (Heading 1/2/3, Normal) to impose a consistent structure. Learn more about professional Word document styles for consistent formatting.
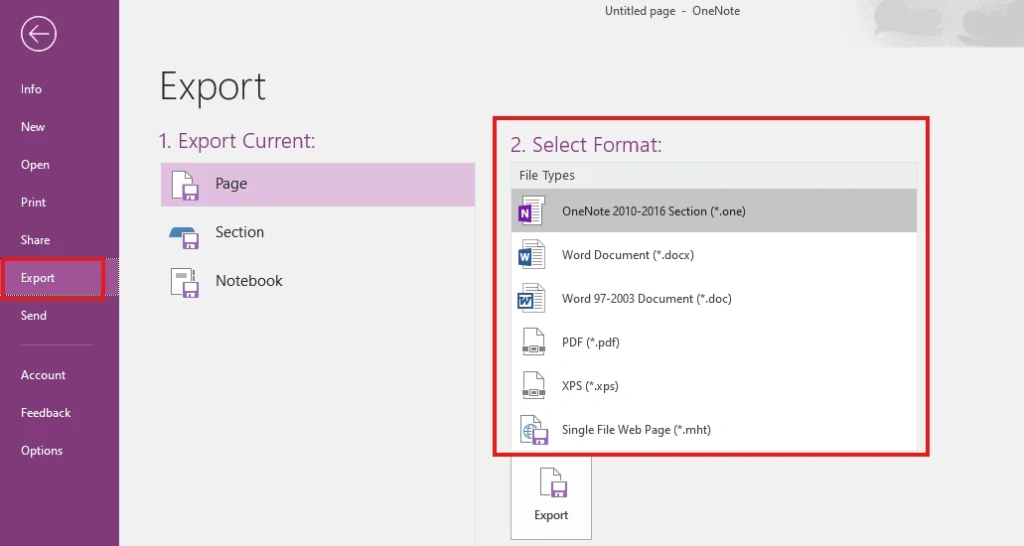
About exporting to Word from OneNote: Export options differ by OneNote version/build. The older “OneNote for Windows 10” app had limited export; the current desktop app exposes File → Export with various formats. On some builds, Word 97–2003 (*.doc) appears (Microsoft is retiring that legacy .doc option in 2025). If you don’t see a Word option, use Workflow C below. For complex documents requiring multiple languages, check our guide on creating multilingual documents in Word after conversion.
Workflow B — Region/Full Page (image) → Word (annotate)
- Clip with Region or Full Page for exact visuals.
- In Word, insert the image(s), add captions, and include alt text for accessibility.
- Add the source URL as a footnote or at the top/bottom of the page.
Workflow C — Export PDF → Open in Word (conversion)
- From OneNote desktop, Export → PDF (or print to PDF).
- In Word, File → Open the PDF. Word converts it to an editable document you can save as .docx. Expect minor reflow differences—fix headings with Styles.
Keyboard Shortcuts for Speed
You can assign your own keyboard shortcut to launch the clipper:
- Chrome: go to
chrome://extensions/shortcutsand set a shortcut for OneNote Web Clipper. - Edge: go to
edge://extensions/shortcuts(same idea).

(Pro tip: pick something you won’t hit accidentally, like Ctrl+Shift+O/Cmd+Shift+O.)
Troubleshooting (real fixes to common problems)
Sign‑in loops or “can’t sign in”
- Remove and reinstall the extension; verify you’re signed into the same Microsoft account in the browser.
- If you’re on a work/school tenant, conditional‑access policies can block sign‑in—your IT admin may need to allow it.
“Full Page” says no content found or misses images
- Some sites lazy‑load or block elements. Wait for the page to fully load, then retry. If it still fails, switch to Article (for text) or Region (for visuals).
Your clip landed in the wrong place
- In the clip dialog, explicitly choose the notebook/section before clipping. If you still can’t find it, search OneNote by the page title or URL.
Company‑managed devices
- Browser extensions may be blocked; ask IT to allow the OneNote Web Clipper. For additional document security after clipping, learn how to password-protect your Word documents containing sensitive research.
Mobile Clipping (iOS & Android)
On phones, you won’t use the browser extension—you’ll share to OneNote from the system share sheet:
- iOS/iPadOS: In Safari/Chrome → Share → OneNote → pick location, add notes, Send.
- Android: Use the system Share menu → OneNote; choose notebook/section (behavior may vary by build/account).
Real‑World Use Cases
| Scenario | Best Mode | Suggested Setup | Why |
|---|---|---|---|
| Academic literature | Article | Thesis Research → Recent Studies | Clean text to style in Word – perfect for students organizing academic research |
| Legal/design evidence | Full Page | Case Notes → Evidence | Pixel‑perfect screenshots |
| News monitoring | Bookmark | Industry News → Daily Digest | Fast, scannable link lists |
| Social posts & quotes | Region/Article | Brand Mentions | Grab only what matters |
Pro Tips
- Use OneNote tags (Important, To‑Do, Question, Quote) after clipping; they’re searchable and perfect for reviews.
- Name pages consistently as you clip.
- Automation: If you’re heavy into feeds/social, consider Power Automate (learn about Power Automate and Word integration) or Zapier to funnel items into OneNote; IFTTT also advertises OneNote hooks, but reliability and account‑type support can vary.
FAQs
Q1: Which mode should I use if I’ll finish in Word?
Article for text you’ll restyle with Word’s Styles; Region/Full Page for screenshots you’ll annotate.
Q2: Can I choose where my clip goes?
Yes—select the notebook/section in the clip panel before clicking Clip.
Q3: Does “Full Page” always capture everything?
No. Some sites block/lazy‑load content. If Full Page stalls or misses pieces, switch to Article or Region.
Q4: How do I convert a clip into a Word document?
Copy/paste into Word, or export from OneNote desktop where available. As a fallback, export to PDF, then open the PDF in Word to convert/edit.
Q5: Can I use the clipper on Firefox?
The official extension was removed from Firefox. Use Edge or Chrome for the Microsoft‑supported add‑on; third‑party Firefox options exist but aren’t official.
Q6: Why can’t I sign in to the clipper on my work account?
Your organization’s conditional‑access policies may block it. Ask IT to allow the extension/sign‑in flow.
