Have you ever struggled to steer a lengthy document?
Section breaks provide an effective solution! They segment your writing into clear, manageable parts, boosting readability and comprehension.
With section breaks, you can tailor formatting—like headers and page numbers—for each segment. Imagine them as chapters in a book, each with its unique style, yet all contributing to the together story. Mastering section breaks not only enhances your document’s appearance but also imparts a polished, professional finish!
Understanding Section Breaks and Their Types
Understanding section breaks in word processing tools like Microsoft Word and Google Docs is critical for effective document organization. Section breaks divide long documents into manageable parts, enhancing readability and providing visual separation. They allow distinct formatting styles, such as different margins or headers and footers, within each section.
There are three main types of section breaks:
- Next Page: Starts a new section on the following page, ideal for chapters.
- Continuous: Creates a new section on the same page, perfect for layout changes without introducing a page break.
- Even Page/Odd Page: Begins a new section on the next even or odd page, ensuring proper formatting for printed materials.
To insert a section break, go to Layout > Breaks and select your desired type. This simple action can greatly improve your written workflow and improve document navigation. For instance, if you want to add a unique header for a new chapter, a section break allows for greater style consistency throughout your document.
Section breaks also aid in manuscript preparation, helping manage paragraph spacing and effectively organizing content. For advanced formatting tips, check out this mail merge guide to lift your document editing skills.
Mastering section breaks is necessary for anyone looking to create professional, well-structured, and easily readable documents.
Next Page Break
In Microsoft Word, a Next Page Break is an necessary section break that initiates a new section on the next page. This feature is critical for managing lengthy documents, allowing for unique formatting in each section. For instance, you can customize headers, footers, and margins, greatly improving document organization.
Using a Next Page Break enhances readability and document navigation. It visually distinguishes sections, making it easier for readers to identify different parts. To insert one, steer to Layout > Breaks and select the Next Page option. This straightforward action can remarkably lift your document’s professionalism.
When creating a manuscript, this technique effectively segments content. For example, in a report with multiple chapters, each chapter can begin on a new page, ensuring consistency in style and clarity. This method simplifies editing and presents your work in a polished manner. For more tips on managing document layouts, check out formatting tips for improved results.
Mastering the Next Page Break is a critical skill in word processing. It gives you control over your document’s flow, enhancing clarity and effectiveness. With this tool, you can create well-structured documents that are both easy to read and visually appealing.
Continuous Break
Continuous breaks are necessary for organizing lengthy documents. They allow us to create distinct sections on the same page without starting over. This feature is particularly beneficial for applying varied formatting, such as adjusting margins or changing column layouts, while maintaining visual coherence.
To insert a continuous break, steer to the Layout tab, select Breaks, and choose the continuous option. This straightforward action effectively segments text, enhancing document navigation and readability. Continuous breaks make sure a smooth flow of headings and subheadings, improving the in general structure of your work.
Also, continuous breaks preserve style consistency throughout the document. For instance, if a section requires a different layout—like a place orientation for a chart—you can do this change without disrupting the entire document. This flexibility is critical for professional documents, where clarity and organization are paramount.
Mastering continuous breaks can remarkably improve your writing workflow. They make easier effective content segmentation, making documents more readable and visually appealing. By leveraging this tool, you can lift your document editing skills and produce polished, professional outputs.
Applying Section Breaks for Document Formatting
Mastering section breaks in Microsoft Word is necessary for anyone creating long documents. These breaks organize content, improving both readability and navigation. By inserting a section break, you can apply unique formatting to each section, such as different headers and footers, varied page layouts, and adjusted margins, fostering a clear visual hierarchy throughout your document.
To insert a section break, go to the Layout tab and click on Breaks. You’ll find several types of section breaks, each with a specific purpose:
- Next Page: Starts a new section on the next page, ideal for chapters.
- Continuous: Begins a new section on the same page, perfect for changing column formats.
Using section breaks greatly enhances document organization and boosts readability. This technique is especially valuable in academic papers and reports, where clear content separation is critical for understanding.
Changing Margins and Page Orientation
Changing margins and page orientation is necessary for effective document organization. By utilizing section breaks, you can customize each section independently. For instance, one section can have narrow margins, while another features wide margins. This flexibility enhances readability and improves content structure.
To adjust margins, initial insert a section break. Go to the Layout tab, select Breaks, and choose the appropriate section break type. This step is critical for lengthy documents that require distinct formatting. For example, you can create a header in one section while leaving another section header-free.
Changing the page orientation from portrait to place is also possible within a section. This adjustment is particularly useful for displaying charts or images. Section breaks help maintain a clear visual hierarchy, making it easier for readers to steer and understand your content.
Section breaks are powerful tools in Microsoft Word that improve document formatting. They provide control over margins and page orientation, ensuring your documents are professional and easy to read.
Customizing Headers and Footers
Customizing headers and footers in Microsoft Word is necessary for creating organized and professional documents. By using section breaks, you can apply unique formatting to each section, improving navigation and readability. This allows for distinct headers and footers for different chapters or sections, enhancing the visual appeal of your documents.
To customize headers and footers, initial insert a section break where you want the change. Go to Layout > Breaks and select the appropriate type. A Next Page break starts a new section on the next page, while a Continuous break allows you to make changes on the same page.
After inserting the break, double-click in the header or footer area to edit. Click the Link to Previous button to unlink it from the previous section. This lets you create unique headers and footers for each section, including different page numbers or styles.
These techniques improve the visual hierarchy of your documents. For instance, you might place a table of contents in the header of the initial section, while a later section’s footer could display the chapter title. This method aids in content separation and maintains style consistency.
By mastering these editing techniques, you make sure your long documents are well-structured and easy to steer. If you encounter formatting issues, check out layout problems for helpful solutions.
Customizing headers and footers with section breaks greatly enhances the organization and professionalism of your documents. With practice, you can create visually appealing documents that effectively communicate your ideas.
Enhancing Document Organization with Section Breaks
Using section breaks is a powerful way to improve document organization. They allow you to divide lengthy documents into smaller, manageable sections, making it easier to structure your content. With a section break, you can customize formatting styles, headers, and footers for each part. This flexibility supports different layouts, including a combination of portrait and place orientations.
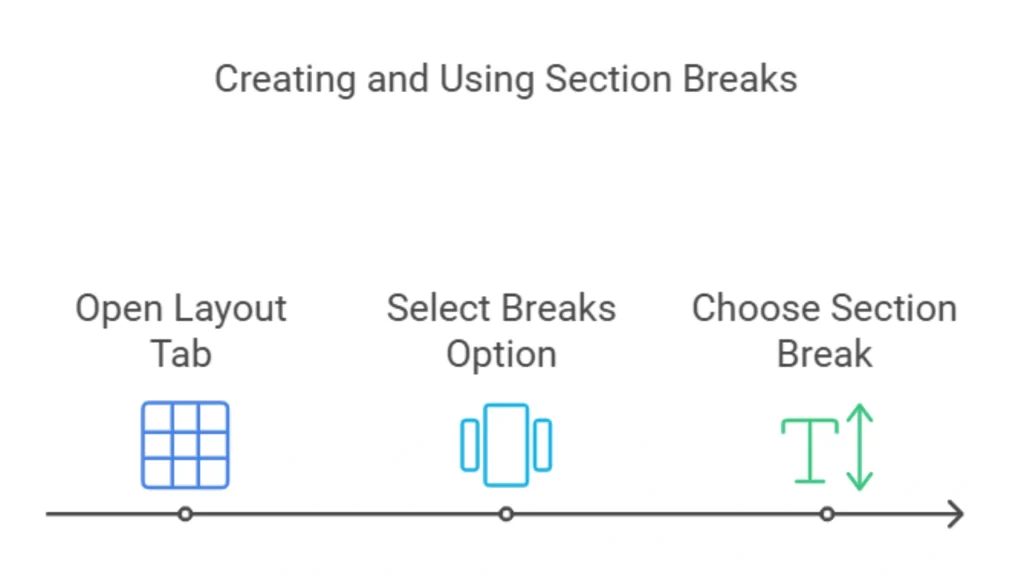
Creating a section break is simple. Just follow these steps:
- Go to Layout: Click the Layout tab in your word processor.
- Select Breaks: Find the Breaks option in the Page Setup group.
- Choose Your Break: Pick the type of section break you need, like Next Page or Continuous.
Section breaks remarkably improve readability and create visual separation between different types of content. This not only boosts document navigation but also ensures consistent styling throughout your work. By mastering section breaks, you can create professional documents that are organized and visually striking!
Improving Readability and Navigation
Improving readability and navigation in lengthy documents is necessary. Effective section breaks create clear visual separation and text segmentation, enabling readers to engage with the content smoothly. Organizing information with headings and subheadings enhances organizational clarity.
- Section breaks: Clearly define distinct sections for different topics.
- Formatting tools: Easily adjust margins, page orientation, and headers for better layout.
- Paragraph spacing: Improve layout and increase text readability.
Using tools like Microsoft Word or Google Docs enhances workflow efficiency. For example, to insert a section break, steer to Layout > Breaks and select your desired type. This simple action can remarkably improve the user experience of your document.
Implementing these writing techniques ensures style consistency and elevates the professionalism of your documents. For more on managing section breaks, check out this helpful guide on section breaks.
Summing up
Section breaks transform lengthy documents by enabling distinct formatting options. Each section can have its own headers, footers, and page numbers, creating a polished and organized look. Think of section breaks as chapters in a book, each with its unique style and layout. By utilizing section breaks, you improve both readability and comprehension. Begin incorporating section breaks to create clear, professional documents today!
Frequently Asked Questions
What are section breaks explain how a section break helps in formatting a document?
Section breaks divide a document into sections, allowing different formatting, headers, footers, and page layouts for better organization.
How do I split a document into sections?
To split a document into sections, go to Layout > Breaks, then select the desired section break type where you want the split.
What is a section break in docs?
A section break in docs divides your document into parts, allowing different formatting for each section, like headers and footers.
Can section breaks affect the formatting of a document?
Yes, section breaks can remarkably affect formatting, allowing different headers, footers, and layouts in different document parts.