

Why Use Microsoft Word for Invoices?
Microsoft Word is widely used due to its accessibility and user-friendly interface. It provides various templates that can be customized to fit your brand’s identity. Here are a few reasons why editing invoice templates in Microsoft Word is advantageous:
- Ease of Use: Most people are familiar with Word’s interface, making it easy to navigate through templates.
- Customizability: You can add your logo, change fonts, and adjust layouts to match your business’s branding.
- Compatibility: Word documents are easy to share and can be opened by most users across different platforms.
Finding an Invoice Template

Before you can start editing, you need to find a suitable invoice template. Microsoft Word offers several templates that you can use:
- Open Microsoft Word.
- Go to the File menu and select New.
- Type “Invoice” in the search bar to view available templates.
- Select a template and click Create to open it.
Editing Invoice Templates in Microsoft Word
Once you have chosen a template, it’s time to start editing. Follow these steps to customize your invoice:
1. Customize Your Business Information
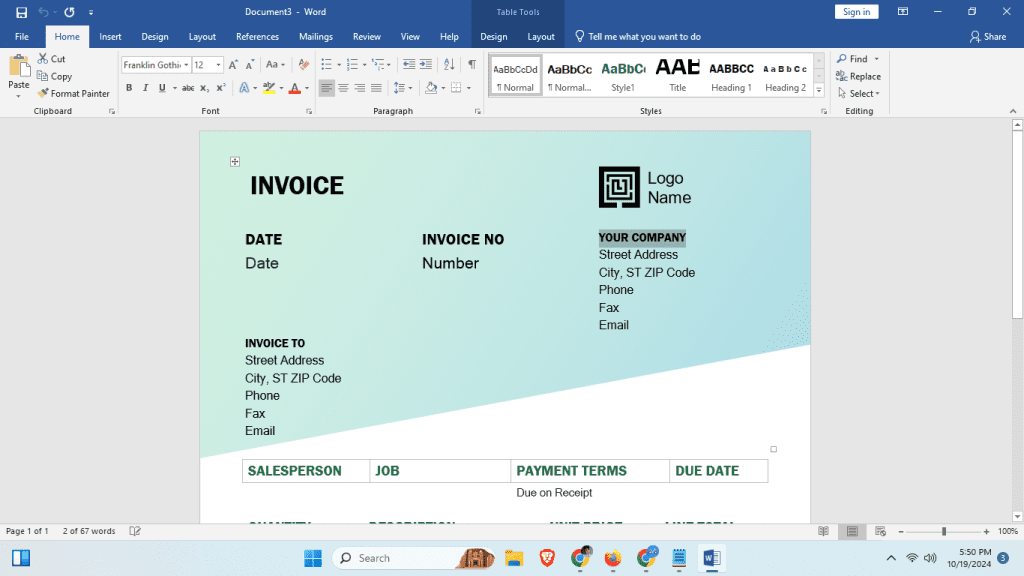
Replace the sample company information with your own:
- Company Name: Ensure your business name is prominently displayed.
- Contact Information: Include your address, phone number, and email.
- Logo: Insert your company logo to enhance branding.
2. Modify Invoice Details
Adjust the following invoice details as necessary:
- Invoice Number: This should be unique for record-keeping.
- Date: Update with the correct invoice date.
- Payment Terms: Specify payment methods and due dates.
3. Itemize Services or Products
One of the critical parts of an invoice is listing your goods or services:
- Break down each product/service with a description.
- Add quantities and each item’s cost.
- Calculate totals, including taxes or discounts.
4. Format for Readability
Ensure your invoice is easy to read. Use the following formatting tips:
- Utilize bullet points or tables for listing items.
- Keep font styles consistent and professional.
- Use headers and sections to guide the reader through the document.
Saving and Sending Your Invoice
After editing your invoice, it’s crucial to save it properly:
- Go to the File menu and select Save As.
- Choose the location to save your document.
- Select the file format (such as .docx or .pdf for sending).
- Click Save.
When sending your invoice, consider the preferences of your clients. A PDF version is often preferred as it maintains formatting and is more professional.
Conclusion
Editing invoice templates in Microsoft Word is a straightforward process that can streamline your billing efforts. By customizing these templates, you can create professional invoices that reflect your brand and facilitate prompt payments. Remember to save your customized invoice for future use, so you can automate the billing process for your business. Start creating your customized invoices today and take a step towards a more organized approach to your business transactions!
For more details, go to Microsoft Official.