Have you ever wondered if your document would look better in portrait or landscape orientation? Choosing the right page layout can make a big difference in how your content looks. Knowing when and how to switch between portrait and landscape page orientation is key to ensuring that your document is well-formatted. For example, charts, images, and tables often look better in landscape, while regular text-heavy content works well in portrait.
This blog will show you when and how to switch between portrait and landscape page orientations in Microsoft Word, making your document easier to read and more visually appealing. For more related terms and features, check out our Glossary of Essential Microsoft Word Terms. Keep reading to learn how to make your documents look great!
What Are Portrait and Landscape Page Orientations?
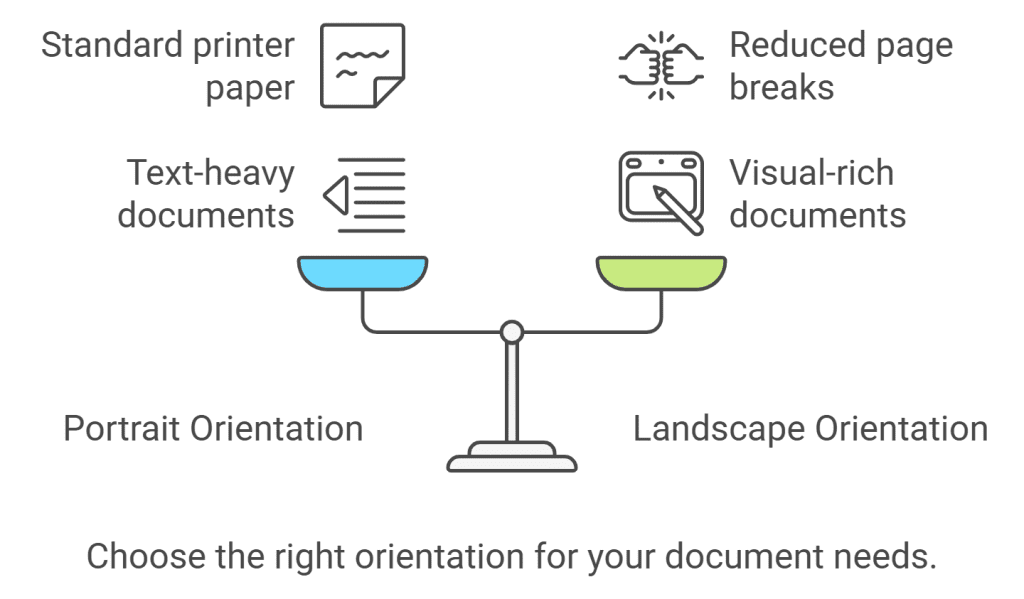
Before we get into how to switch orientations, let’s clarify what portrait and landscape orientations are. In portrait orientation, the page is taller than it is wide. This is the default setting in most word processing programs and works best for text-heavy documents. Landscape orientation, on the other hand, is wider than it is tall and is often used for content that needs more horizontal space, like tables, charts, or images.
When to Use Portrait vs. Landscape Orientation
1. Portrait Orientation: The Standard Choice
Most of the time, you’ll use portrait orientation because it’s the most practical and easy to read for regular text documents. Whether it’s a school essay, a business letter, or an eBook, portrait orientation keeps the lines of text short enough to follow easily.
Use portrait orientation when:
- You have a text-heavy document with no large graphics.
- You need a traditional format for formal documents like reports, letters, and essays.
- You want to print the document on standard printer paper (8.5” x 11”).
2. Landscape Orientation: Ideal for Visuals
Landscape orientation is best when your document has elements that look better horizontally. This includes images, wide tables, graphs, and diagrams that need extra space to be fully visible without getting squished. For more on adjusting page settings, see our guide on Adjusting Page Margins for Different Document Types.
Use landscape orientation when:
- You need more horizontal space for large tables or detailed charts.
- You want to display images that look better in a wider layout.
- You want to reduce page breaks to keep related visuals together.
How to Switch Between Portrait and Landscape Orientation
Switching between portrait and landscape orientation in Microsoft Word is easy, and understanding when and how to switch between portrait and landscape page orientation can help make your document look better by fitting your content more effectively. Follow these steps to change the page orientation:
Step-by-Step Guide to Change Page Orientation
- Open Your Document: Start by opening your Word document.
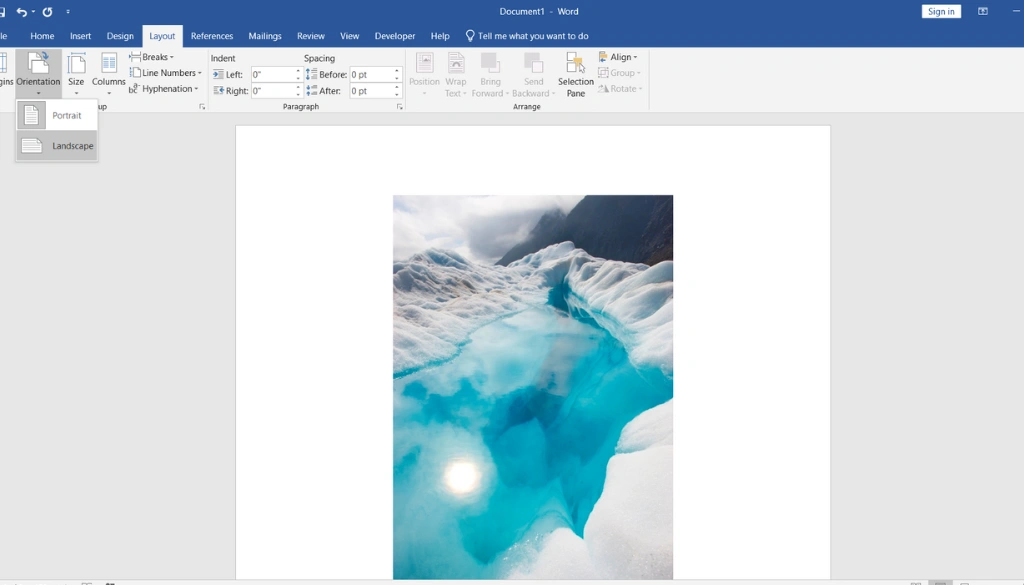
- Navigate to the “Layout” Tab: At the top of the screen, click on the Layout tab. This is where you’ll find most of the tools related to page formatting.
- Click on “Orientation”: In the Page Setup group, you will see an option called Orientation. Click on it.
- Choose Portrait or Landscape: A dropdown will appear with two options: Portrait and Landscape. Choose the one that best fits your content.
And that’s it! You’ve successfully changed the page orientation.
Switching Orientation for Specific Pages
Sometimes, you might only want certain pages in your document to be in landscape while the rest stays in portrait. For example, this can be useful if you have a wide table in a report that needs extra horizontal space.
To change the orientation of specific pages, follow these steps:
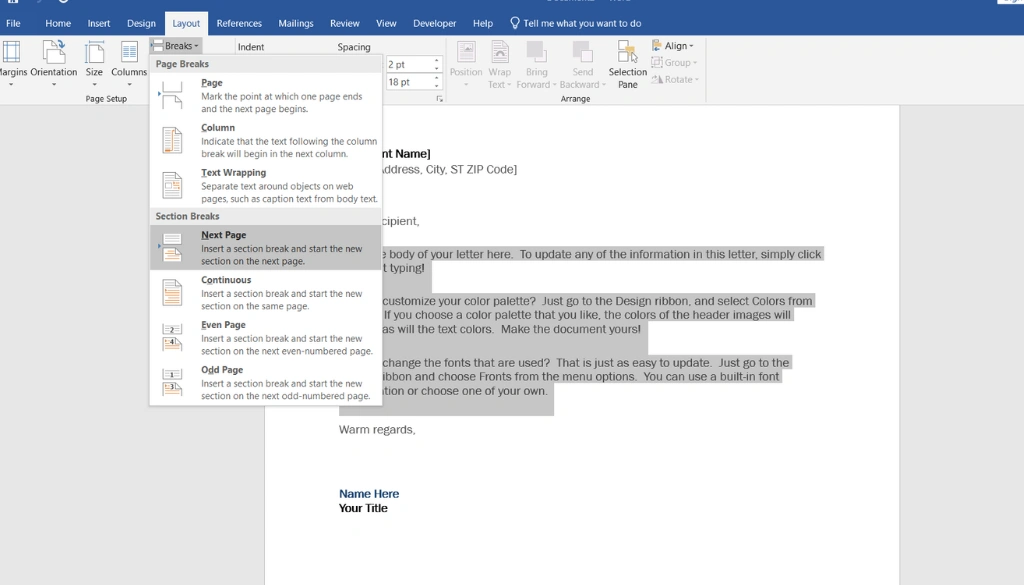
- Select the Content: Highlight the section or place your cursor where you want the orientation change to start.
- Use Section Breaks: Go to the Layout tab, click on Breaks, and then select Next Page under the Section Breaks options. This lets you separate the page you want to change.
- Change Orientation: Now, with your cursor in the new section, go back to the Orientation button and select Landscape.
This way, you can mix both portrait and landscape orientations in the same document—great for keeping everything organized and easy to read.
Common Questions About Page Orientation
1. Can I Use Both Orientations in the Same Document?
Yes, you can! By using section breaks, you can mix portrait and landscape orientations in the same document. This is helpful for reports that have both text and visuals.
2. Will Changing the Orientation Affect My Formatting?
Switching orientations can sometimes change the layout, especially if your document has tables, images, or other elements with specific alignment. Always double-check your document after changing the orientation to make sure everything looks right. If you need more help, you can refer to Microsoft Word’s Built-in Support.
3. What If I Only Need One Page in Landscape?
If you only need one page in landscape orientation, use section breaks before and after that page. This way, the rest of your document will stay in portrait orientation.
Practical Tips for Using Page Orientation Effectively
- Preview Before Printing: Always use the Print Preview option to see how your document will look in the chosen orientation. This helps avoid issues with cropped content or awkward page breaks.
- Use Section Breaks Wisely: When combining both orientations, make sure to use section breaks to keep your document organized and easy to navigate.
- Consider Your Audience: Think about how your audience will view the document. If it’s going to be printed, portrait orientation is usually best. If it will be viewed on a screen and has lots of visuals, landscape might be better.
Benefits of Using the Right Page Orientation
Choosing the right page orientation can have a big impact on how effective your document is. Here’s why:
- Improved Readability: Using the right orientation can make your document easier to read. For example, using landscape for wide tables prevents the reader from needing to scroll or turn the page to see everything.
- Professional Appearance: A well-formatted document shows that you’ve taken the time to think about presentation, making it look more professional.
- Better Use of Space: Landscape orientation can help you use space more effectively for content that needs a wider layout, like timelines or flowcharts.
Conclusion
Knowing when and how to switch between portrait and landscape page orientation can make a big difference in how your document looks and reads. For example, portrait orientation is best for long blocks of text, while landscape orientation is great for wide tables and large images. Use portrait for most of your text, and switch to landscape when you need more space for visuals. Remember to use section breaks to mix orientations and keep your formatting on point. For additional editing tools, check out our list of Top Free Microsoft Word Add-ins for Editing.
Whether you’re working on a school project, a business report, or a creative portfolio, mastering page orientation will help you make the best impression. For more official guidance, visit Microsoft’s official Word support page. Now it’s your turn—try adjusting the page orientation in your next Word document and see how it improves your layout!